介绍
随着物联网和嵌入式系统的普及,如何在资源受限的硬件上实现高效的机器学习推理成为一个重要课题。行空板 K10 AI 硬件结合 TensorFlow Lite Micro (TFLM),为嵌入式设备上的 TinyML 开发 提供了轻量级的解决方案。从模型训练到最终部署,本文将详细讲解如何通过 K10 硬件 和 Arduino TensorFlow 开发环境,快速实现 嵌入式机器学习 应用。同时,这一教程也适用于类似的硬件平台,例如 ESP32 S3 AI 设备。
本文将结合 DFRobot 行空板K10 硬件 和 TensorFlow-Lite-Mirco 库,介绍如何从模型训练到最终部署,实现一个完整的 TinyML 开发过程,帮助开发者快速上手资源受限设备上的机器学习推理。代码下载链接:https://github.com/polamaxu/TFLM
行空板K10
行空板 K10是一款专为信息科技课程中的编程学习、物联网及AI项目教学需求而开发的学习板。
核心
- MCU:ESP32-S3,32位双核处理器,主频为240MHz.
无线通信
- Wi-Fi:支持2.4G Wi-Fi
- 蓝牙:支持蓝牙5.0
显示模块
板载元件
- 摄像头:集成摄像头,支持图像采集和检测,可以用于人脸识别、物体检测等人工智能应用.
- 麦克风:配备两个麦克风,能够捕捉声音信号,支持语音识别和语音交互功能.
- 扬声器:内置扬声器,可以播放音频,用于语音提示和音乐播放等.
- 传感器:包括数字环境光传感器、温湿度传感器和加速度传感器,能够检测环境参数和运动状态,为物联网应用提供数据支持.
- RGB灯:有三个RGB灯,可以显示多种颜色
- 实体按键:有两个实体按键,可以用于输入和控制操作.
Tensorflow vs TensorFlow-Lite-Mirco
TensorFlow 是一个开源机器学习框架。TensorFlow 提供了丰富的 API,使得开发者可以轻松地构建、训练和部署机器学习模型。
TensorFlow Lite Micro 是 TensorFlow 的一个子集,专门为微控制器等资源受限的设备设计。它允许开发者将机器学习模型部署到这些设备上,使得设备能够直接在本地进行数据处理和推理,而不需要依赖云端计算。
TinyML开发流程(软件Arduino IDE、硬件行空板K10)
数据采集:
- 创建一个 Arduino Sketch 用于从传感器或其他输入设备收集数据,以形成模型训练所需的数据集。
定义与训练模型:
- 在 TensorFlow 开发环境中(如 Google Colab)定义一个深度神经网络模型(DNN),并使用采集到的数据对模型进行训练。
模型转换与保存:
- 将训练好的模型转换为 TensorFlow Lite 格式,并保存为 model.h 文件,其中包含模型的二进制表示(Flat Buffer 格式)。
部署推理代码:
- 在 Arduino IDE 中准备推理代码,包含以下步骤:
- 引入必要头文件(如 TensorFlow Lite Micro 和模型文件 model.h)。
- 定义 TensorArena(内存缓冲区)。
- 初始化模型。
- 设置输入数据并运行推理。
- 读取推理输出。
测试与优化:
- 通过串口调试工具查看推理结果,并根据需要优化模型性能。
MicroTFLite介绍
MicroTFLite 是一个为 Arduino 设计的 TensorFlow Lite Micro 库,旨在简化在 Arduino 板上使用 TensorFlow Lite Micro 的过程。MicroTFLite库适用于各种任务,如分类、回归、预测。
1. 特点
- Arduino 风格的 API:MicroTFLite 提供了典型的 Arduino 风格的 API,避免了在 Arduino 代码中使用指针或其他 C++ 语法构造,这使得它更适合 Arduino 开发者使用。
- 支持量化数据和浮点数据:该库能够处理量化数据和原始浮点值,根据模型的元数据自动检测适当的处理方式。
- 调试功能:提供了多个函数来帮助开发者了解模型部署的过程,并在调试模型问题时提供帮助。
2. 目标平台
MicroTFLite 适用于多种嵌入式设备,包括:
- Arduino Nano 系列(如 Nano 33 BLE、Nano ESP32)
- Arduino Nicla、Portenta 系列
- ESP32 和 Arduino Giga R1 WiFi
3. MicroTFLite支持的算子
MicroTFLite 支持多种常见的机器学习算子:
- 卷积与池化:
- 二维卷积(CONV_2D)、深度可分离卷积(DEPTHWISE_CONV_2D)
- 最大池化(MAX_POOL_2D)、平均池化(AVERAGE_POOL_2D)
- 全连接层:FULLY_CONNECTED
- 激活函数:
4. MicroTFLite API一览
- 模型初始化和部署
- 初始化模型:通过
ModelInit() 函数,可以初始化 TensorFlow Lite 模型和解释器。这包括加载模型数据和分配必要的内存空间(如 tensorArena).
- 加载模型文件:支持从二进制文件(如
model.h)中加载预训练的 TensorFlow Lite 模型,使其能够在 Arduino 设备上运行.
- 输入和输出处理
- 设置输入数据:使用
ModelSetInput() 函数可以将输入数据设置到模型的输入张量中。该函数还支持量化处理,能够根据模型的量化参数自动调整输入值.
- 获取输出结果:通过
ModelGetOutput() 函数可以读取模型推理后的输出结果。这使得开发者能够获取模型的预测值或分类结果.
- 推理和调试
- 运行推理:调用
ModelRunInference() 函数可以启动模型的推理过程。该函数执行模型的前向传播,生成输出结果.
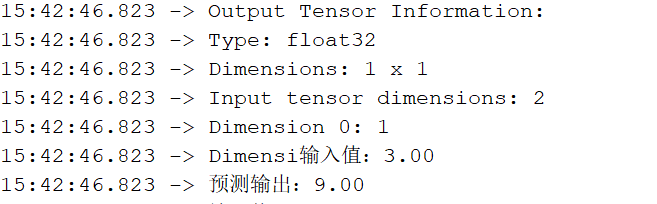
- 打印张量信息:提供了多个函数来打印模型的张量信息,如
ModelPrintInputTensorDimensions()和 ModelPrintOutputTensorDimensions(),这些函数可以帮助开发者了解输入和输出张量的维度.
- 调试和调试信息:
ModelPrintTensorQuantizationParams() 函数可以打印输入和输出张量的量化参数,这对于调试量化模型非常有用。ModelPrintMetadata()函数可以打印模型的元数据信息,如描述和版本,帮助开发者了解模型的基本信息.
MicroTFLite安装
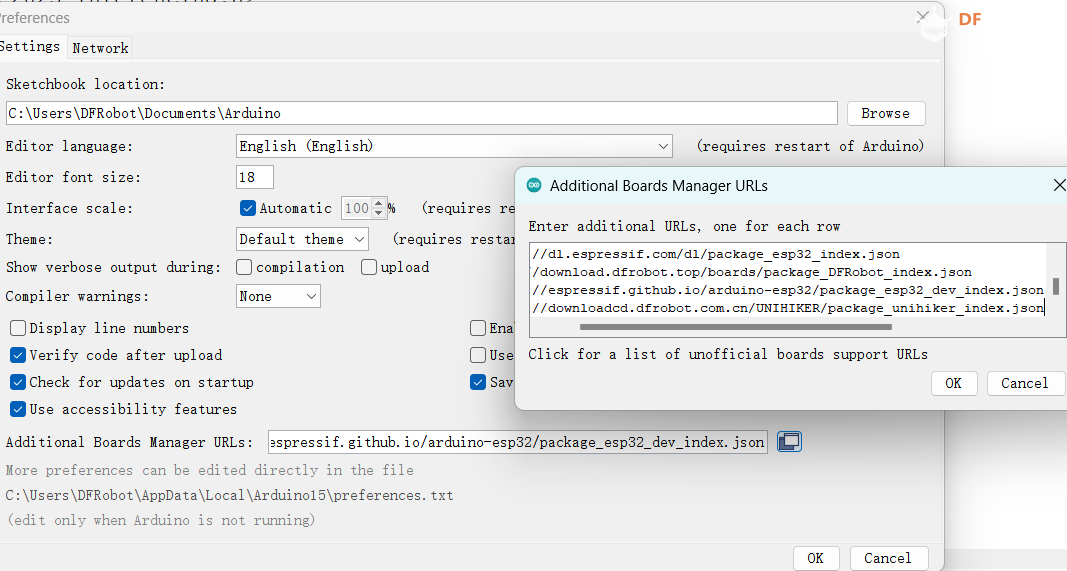
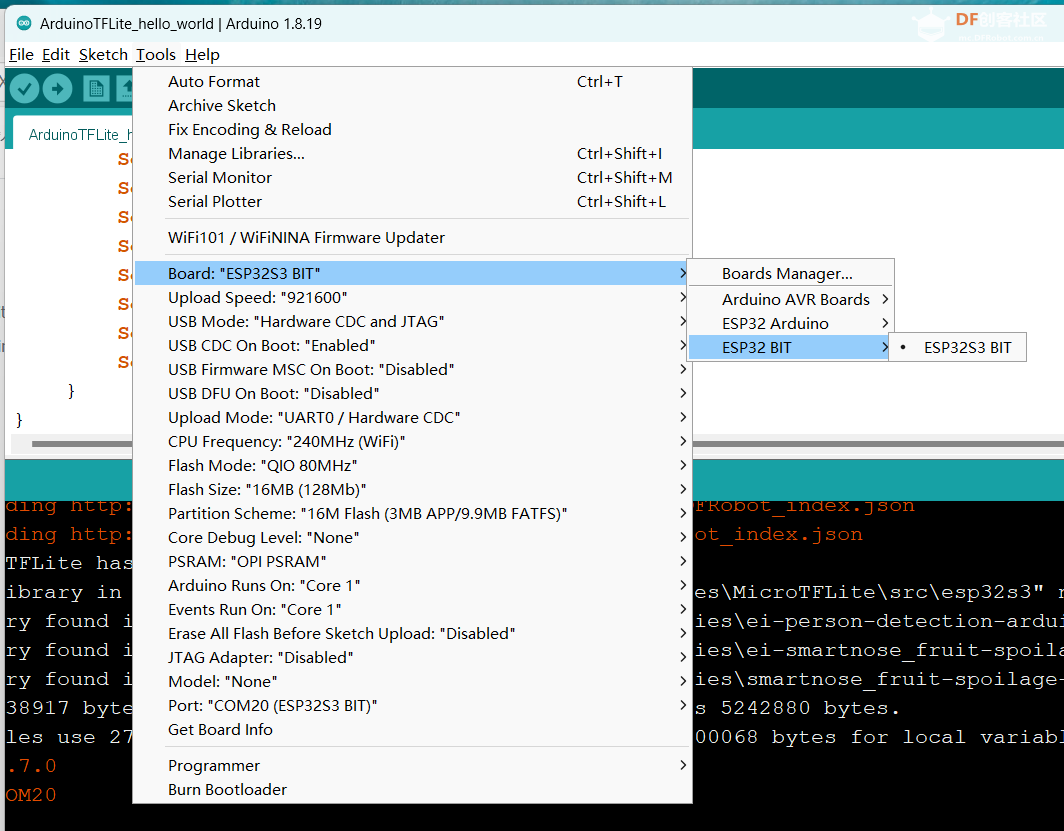
1. arduinoIDE 1.8.19 preferences安装行空板K10环境
https://downloadcd.dfrobot.com.cn/UNIHIKER/package_unihiker_index.json
2. Library Manager搜索MicroTFLite安装

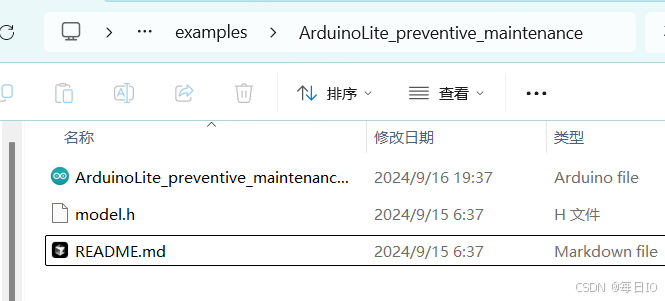
3. 示例测试:通过传感器数据实时预测工业设备故障
ArduinoLite_preventive_maintenance项目使用的是一个前馈神经网络架构,包含输入层、两个 Dropout 层、一个隐藏层和输出层,处理二元分类任务。使用 binary_crossentropy 作为损失函数和 adam 优化器进行训练,支持类别权重调整和早停回调,确保在类别不平衡时仍能有效训练。示例中使用了随机数模拟的传感器数据,比如转速、温度、振动、电流。为了减少模型大小,此模型量化成int8。
这个程序的主要功能是:
- 模拟采集设备的各项参数(转速、温度、振动、电流)
- 使用这些参数进行故障预测
- 同时通过预设的阈值进行实际故障判断
- 比较预测结果和实际故障情况,统计预测准确度提升
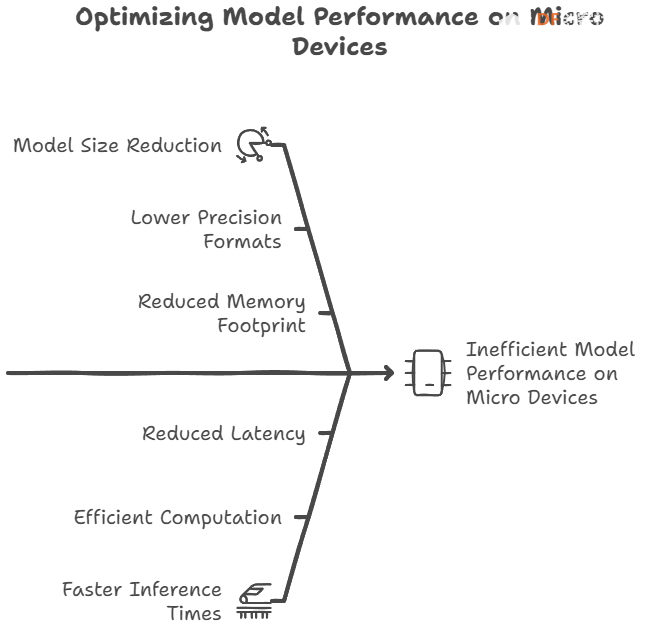
量化作用和影响:TensorFlow Lite for Microcontrollers (TFLM) 的量化是将模型中的数据从浮点数(float32)转换为整数(int8)的过程。
- 减少模型大小:量化将模型中的浮点数转换为整数,显著减少了模型的存储需求。
- 提高计算效率:在资源受限的设备上,整数计算通常比浮点计算更高效。整数运算器(如 ARM Cortex-M 的 DSP 扩展)可以更快地执行整数乘法和加法等操作,从而提高模型的推理速度.
- 精度损失:量化会引入一定的精度损失,因为整数表示无法完全精确地表示浮点数。然而,通过合理的量化策略和模型优化,可以在保持较高精度的同时实现显著的性能
/* Copyright 2024 John O'Sullivan, TensorFlow Authors. All Rights Reserved.
这是一个使用 MicroTFLite 库运行 TensorFlow Lite 模型的示例程序
主要用于设备的预防性维护,通过传感器数据预测可能的故障
更多信息请参考库文档:
https://github.com/johnosbb/MicroTFLite
Licensed under the Apache License, Version 2.0 (the "License");
... 许可证信息 ...
==============================================================================*/
#include <MicroTFLite.h>
#include "model.h"
// 特征数据的统计信息(缩放和平衡前):
// 转速(RPM) - 平均值: 1603.866, 标准差: 195.843
// 温度(°C) - 平均值: 24.354, 标准差: 4.987
// 振动(g) - 平均值: 0.120, 标准差: 0.020
// 电流(A) - 平均值: 3.494, 标准差: 0.308
constexpr float tMean = 24.354f; // 温度平均值
constexpr float rpmMean = 1603.866f; // 转速平均值
constexpr float vMean = 0.120f; // 振动平均值
constexpr float cMean = 3.494f; // 电流平均值
constexpr float tStd = 4.987f; // 温度标准差
constexpr float rpmStd = 195.843f; // 转速标准差
constexpr float vStd = 0.020f; // 振动标准差
constexpr float cStd = 0.308f; // 电流标准差
// 定义故障条件的阈值
const float highTempThreshold = 30.0f; // 温度过高阈值(摄氏度)
const float lowRpmThreshold = 1500.0f; // 转速过低阈值
const float highVibrationThreshold = 0.60f; // 振动过高阈值(g)
const float abnormalCurrentLowThreshold = 0.2f; // 电流过低阈值(安培)
const float abnormalCurrentHighThreshold = 10.8f; // 电流过高阈值(安培)
// 预测统计计数器
int totalPredictions = 0;
int truePositives = 0;
int falsePositives = 0;
int trueNegatives = 0;
int falseNegatives = 0;
float rollingAccuracy = 0.0f;// 滚动计算的准确率
bool showStatistics = false; // 是否显示统计信息
// 为TensorFlow Lite分配内存
constexpr int kTensorArenaSize = 4 * 1024;
alignas(16) uint8_t tensorArena[kTensorArenaSize];
void setup() {
// 初始化串口通信并等待串口监视器打开
Serial.begin(115200);
while (!Serial);
delay(5000);
Serial.println("Preventative Maintenance Example.");
Serial.println("Initializing TensorFlow Lite Micro Interpreter...");
// 初始化TensorFlow Lite模型
if (!ModelInit(model, tensorArena, kTensorArenaSize)) {
Serial.println("Model initialization failed!");
while (true);
}
Serial.println("Model initialization done.");
ModelPrintMetadata();
ModelPrintTensorQuantizationParams();
ModelPrintTensorInfo();
}
// 使用Box-Muller变换生成正态分布的随机值
float GenerateRandomValue(float mean, float stddev) {
float u1 = random(0, 10000) / 10000.0f;
float u2 = random(0, 10000) / 10000.0f;
// Box-Muller变换生成正态分布值
float z0 = sqrt(-2.0f * log(u1)) * cos(2.0f * PI * u2);
float value = mean + z0 * stddev;
return value;
}
// 模拟读取传感器数据的函数
float ReadRpm() {
return GenerateRandomValue(rpmMean, rpmStd);
}
float ReadVibration() {
return GenerateRandomValue(vMean, vStd);
}
float ReadTemperature() {
return GenerateRandomValue(tMean, tStd);
}
float ReadCurrent() {
return GenerateRandomValue(cMean, cStd);
}
// 检查是否存在故障条件
bool CheckFailureConditions(float temperature, float rpm, float vibration, float current) {
bool conditionMet = false;
String failureReason = "";
// 检查各项参数是否超过阈值
if (temperature > highTempThreshold) {
conditionMet = true;
failureReason += "温度过高; ";
}
if (rpm < lowRpmThreshold) {
conditionMet = true;
failureReason += "转速过低; ";
}
if (vibration > highVibrationThreshold) {
conditionMet = true;
failureReason += "振动过大; ";
}
if (current < abnormalCurrentLowThreshold) {
conditionMet = true;
failureReason += "电流过低; ";
}
if (current > abnormalCurrentHighThreshold) {
conditionMet = true;
failureReason += "电流过高; ";
}
if (conditionMet) {
Serial.print("注意:传感器读数表明可能存在故障。原因: ");
Serial.println(failureReason);
}
return conditionMet;
}
void loop() {
// 读取传感器数据(这里使用模拟数据)
float rpm = ReadRpm();
float temperature = ReadTemperature();
float current = ReadCurrent();
float vibration = ReadVibration();
bool inputSetFailed = false;
// 检查实际故障条件
bool actualFailure = CheckFailureConditions(temperature, rpm, vibration, current);
// 数据标准化处理
float temperatureN = (temperature - tMean) / tStd;
float rpmN = (rpm - rpmMean) / rpmStd;
float currentN = (current - cMean) / cStd;
float vibrationN = (vibration - vMean) / vStd;
// 将数据输入到模型中
if (!ModelSetInput(temperatureN, 0))
inputSetFailed = true;
if (!ModelSetInput(rpmN, 1))
inputSetFailed = true;
if (!ModelSetInput(currentN, 2))
inputSetFailed = true;
if (!ModelSetInput(vibrationN, 3))
inputSetFailed = true;
// 运行模型推理
if (!ModelRunInference()) {
Serial.println("模型推理失败!");
return;
}
// 获取模型输出结果
float prediction = ModelGetOutput(0);
bool predictedFailure = (prediction > 0.50f); // 预测值>0.5表示可能发生故障
// 更新预测统计信息
if (predictedFailure && actualFailure) {
truePositives++;
} else if (predictedFailure && !actualFailure) {
falsePositives++;
showStatistics = true;
} else if (!predictedFailure && actualFailure) {
falseNegatives++;
showStatistics = true;
} else if (!predictedFailure && !actualFailure) {
trueNegatives++;
}
totalPredictions++;
// 计算滚动准确率
rollingAccuracy = (float)(truePositives + trueNegatives) / totalPredictions * 100.0f;
// 当出现假阳性或假阴性时显示统计信息
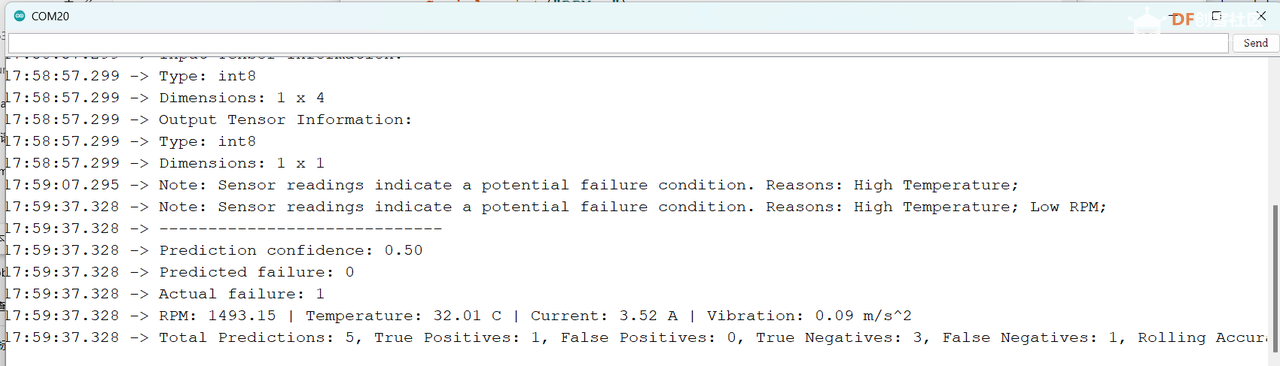
if (showStatistics) {
Serial.println("-----------------------------");
Serial.print("预测置信度: ");
Serial.println(prediction);
Serial.print("预测是否故障: ");
Serial.println(predictedFailure);
Serial.print("实际是否故障: ");
Serial.println(actualFailure);
Serial.print("转速: ");
Serial.print(rpm);
Serial.print(" | 温度: ");
Serial.print(temperature);
Serial.print(" °C");
Serial.print(" | 电流: ");
Serial.print(current);
Serial.print(" A");
Serial.print(" | 振动: ");
Serial.print(vibration);
Serial.print(" m/s^2\n");
Serial.println("总预测次数: " + String(totalPredictions) +
", 真阳性: " + String(truePositives) +
", 假阳性: " + String(falsePositives) +
", 真阴性: " + String(trueNegatives) +
", 假阴性: " + String(falseNegatives) +
", 准确率(%): " + String(rollingAccuracy));
showStatistics = false;
}
delay(10000); // 等待10秒后进行下一次检测
}
|


 0
0 0
0


 已为社区贡献1条内容

所有评论(0)